Introduction
Microsoft Clarity is a free website analytics tool that provides user behavior heatmaps, session recordings, and detailed analytics data to help webmasters better understand user behavior, optimize website content, and improve user experience. Once you have built your own blog website, you would certainly want to track user behavior, and this tool can help you achieve that analysis function. For static blog websites built using Hugo, integrating Clarity is straightforward and can be done in just a few steps.
Prerequisites
Before getting started, you will need:
- A pre-built Hugo blog website. You can refer to previous articles for corresponding tutorials.
- A Microsoft Clarity account (can be registered at Clarity website).
- Basic knowledge of Hugo configuration files and themes.
Step 1: Obtain Clarity Tracking Code
- Register and Create Project:
-
Visit the Microsoft Clarity website and log in with your Microsoft account.
-
Create a new project and enter your blog website URL (e.g.,
https://heyjude.blog).
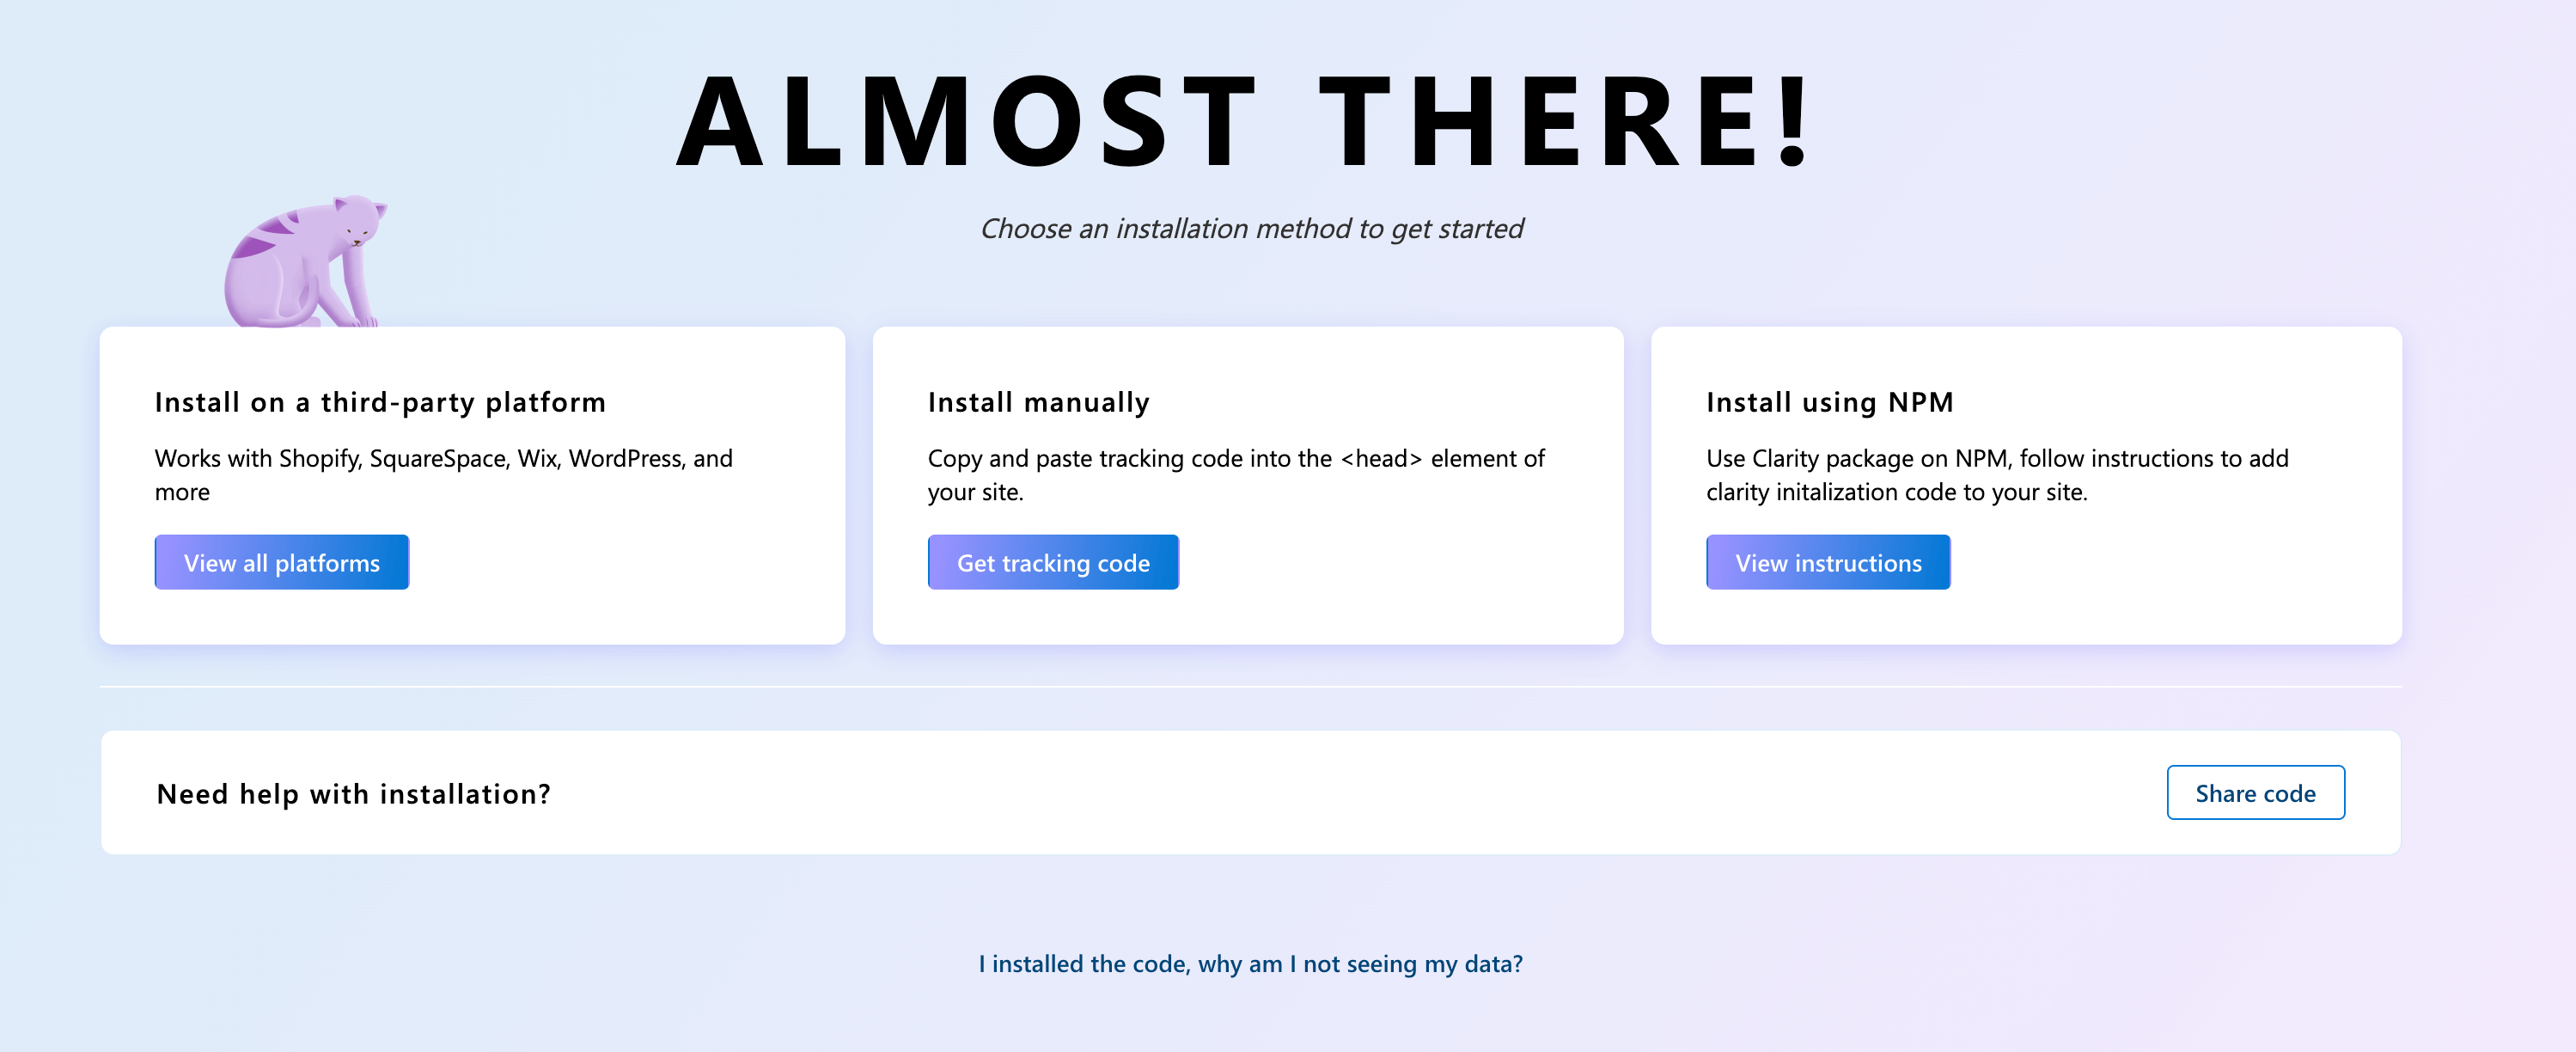
-
After saving the project, Clarity will generate a tracking code similar to:
HTML<script type="text/javascript"> (function(c,l,a,r,i,t,y){ c[a]=c[a]||function(){(c[a].q=c[a].q||[]).push(arguments)}; t=l.createElement(r);t.async=1;t.src="https://www.clarity.ms/tag/"+i; y=l.getElementsByTagName(r)[0];y.parentNode.insertBefore(t,y); })(window, document, "clarity", "script", "your_project_id"); </script>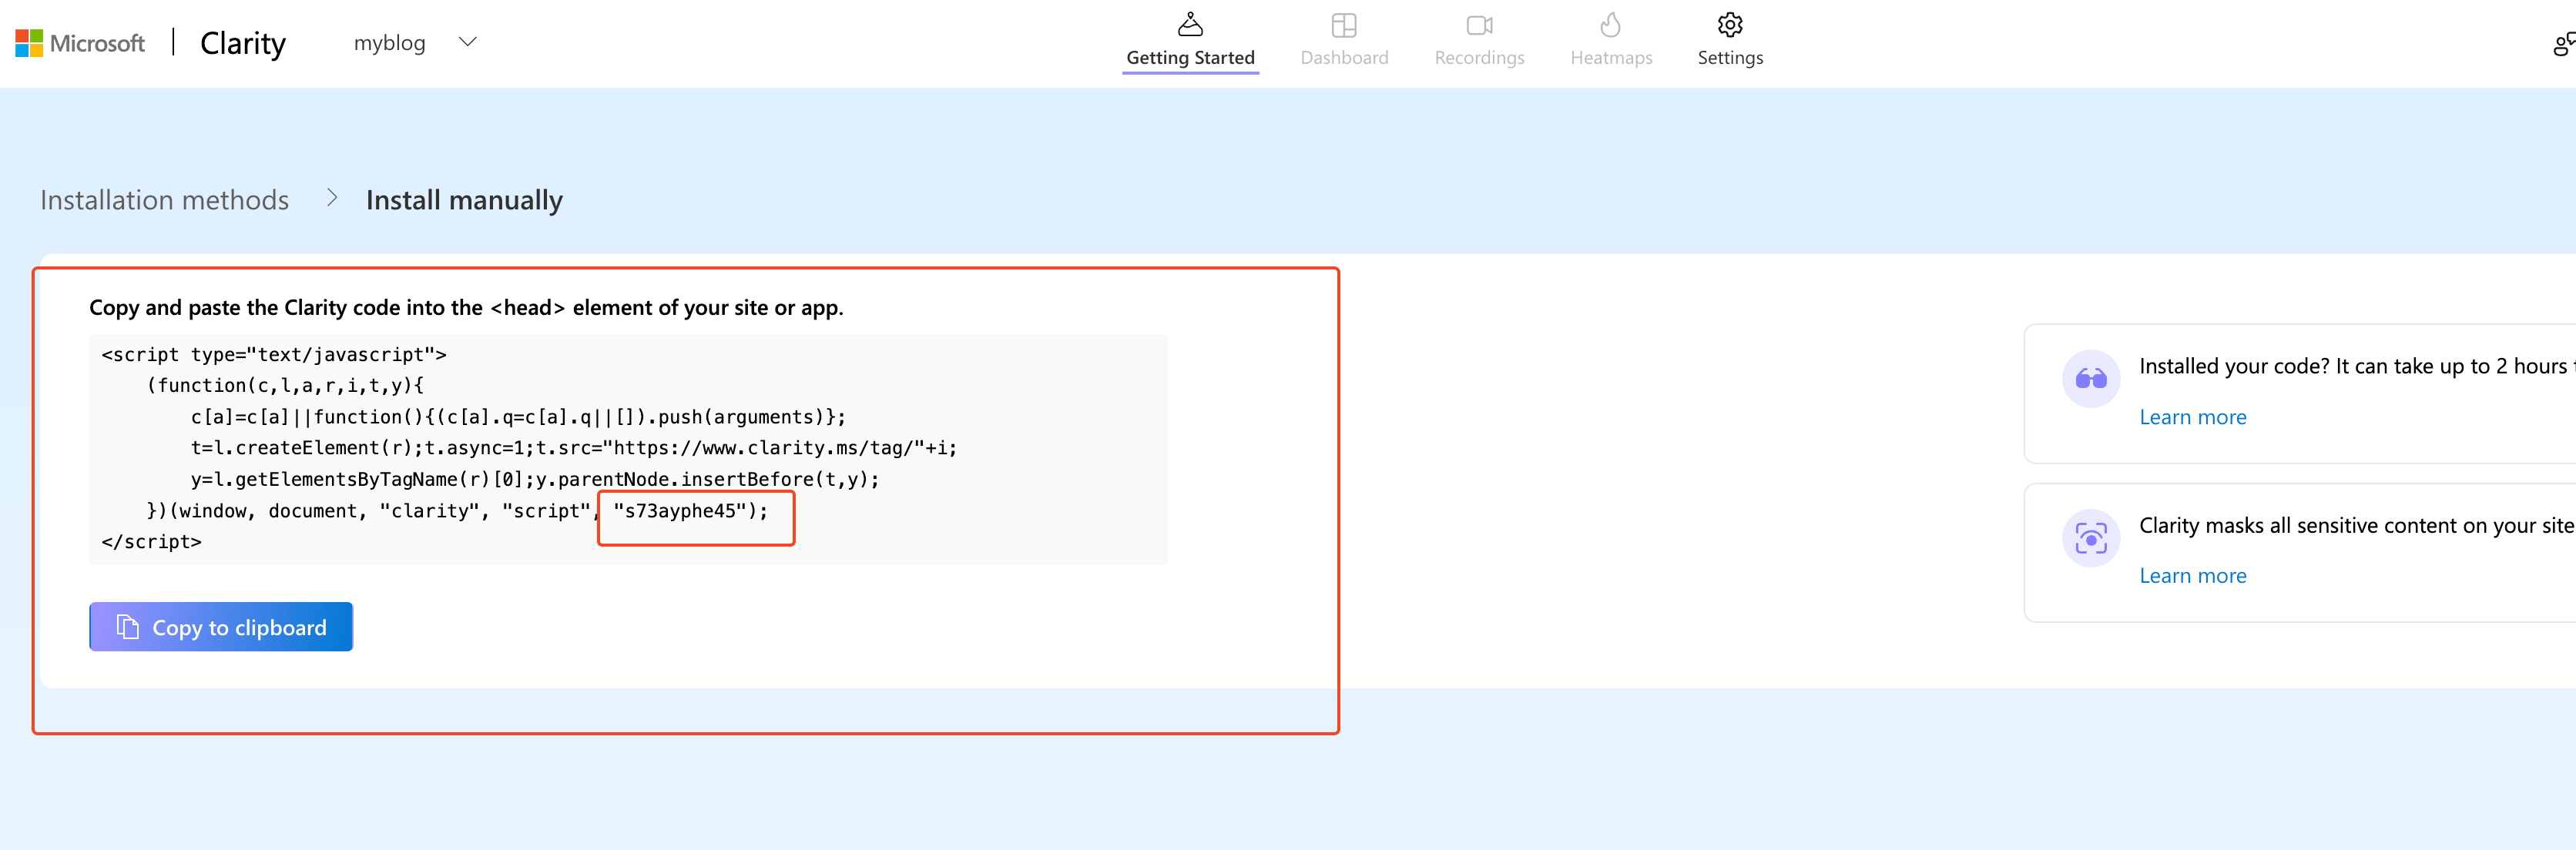
-
Copy the
your_project_id(Project ID) from this code, as it will be needed later.
-
Step 2: Add Clarity Tracking Code to Hugo Blog
Since we have built our own blog based on Hugo, we know that Hugo is a static site generator, where all page content is generated through template files (layouts directory). We need to embed Clarity’s tracking code into the <head> tag of the website.
Method 1: Based on Theme Used
Typically, we use pre-built themes to create our blogs, where some themes may already include Clarity code. In this case, you just need to replace the project ID with your own. Here, the author uses the hugo-narrow theme, which comes with Clarity’s code built-in. You just need to replace the project ID.
  analytics:
    enabled: true
    baidu:
      enabled: false
      id: "your-baidu-analytics-id"
    clarity:
      enabled: true
id: "your_project_id"This completes the deployment.
Method 2: Directly Modify the Theme’s head.html
-
Find the Theme’s
head.htmlFile:- Open the
themes/your-theme/layouts/partials/directory of the Hugo project and locate thehead.htmlor a similar file (the filename may vary depending on the theme, such asheader.html). - If your theme does not have a
head.html, you can check thelayouts/_default/baseof.htmlfile.
- Open the
-
Add the Clarity Tracking Code:
-
Paste the tracking code provided by Clarity inside the
<head>tag in thehead.htmlfile. For example:HTML{{ if not .Site.IsServer }} <script type="text/javascript"> (function(c,l,a,r,i,t,y){ c[a]=c[a]||function(){(c[a].q=c[a].q||[]).push(arguments)}; t=l.createElement(r);t.async=1;t.src="https://www.clarity.ms/tag/"+i; y=l.getElementsByTagName(r)[0];y.parentNode.insertBefore(t,y); })(window, document, "clarity", "script", "your_project_id"); </script> {{ end }} -
Note: We use the
{{ if not .Site.IsServer }}conditional statement to avoid loading Clarity code in local development mode (hugo server) to prevent interference with local test data.
-
-
Save and Test:
- After saving the file, run
hugo server -Dto preview the website locally. - Deploy the website to a production environment (e.g., GitHub Pages or Vercel), then access the Clarity dashboard to verify if data recording has started.
- After saving the file, run
Method 3: Add Through Hugo Configuration File
If you prefer not to directly modify the theme files (e.g., for easier theme updates), you can add the Clarity code through Hugo’s configuration file.
-
Edit
config.tomlorconfig.yaml:-
Open the
config.toml(orconfig.yaml) file in the root directory of the Hugo project. -
Add the Clarity tracking code to the
[params]section. For example, inconfig.toml:TOML[params] customHeadHTML = """ <script type='text/javascript'> (function(c,l,a,r,i,t,y){ c[a]=c[a]||function(){(c[a].q=c[a].q||[]).push(arguments)}; t=l.createElement(r);t.async=1;t.src='https://www.clarity.ms/tag/'+i; y=l.getElementsByTagName(r)[0];y.parentNode.insertBefore(t,y); })(window, document, 'clarity', 'script', 'your_project_id'); </script> """ -
If using
config.yaml, add:YAMLparams: customHeadHTML: | <script type='text/javascript'> (function(c,l,a,r,i,t,y){ c[a]=c[a]||function(){(c[a].q=c[a].q||[]).push(arguments)}; t=l.createElement(r);t.async=1;t.src='https://www.clarity.ms/tag/'+i; y=l.getElementsByTagName(r)[0];y.parentNode.insertBefore(t,y); })(window, document, 'clarity', 'script', 'your_project_id'); </script>
-
-
Modify Theme Template to Include Custom HTML:
-
In
themes/your-theme/layouts/partials/head.html, add the following code to reference thecustomHeadHTMLfrom the configuration file:HTML{{ if .Site.Params.customHeadHTML }} {{ .Site.Params.customHeadHTML | safeHTML }} {{ end }} -
This will ensure that the Clarity tracking code is correctly loaded into the
<head>tag.
-
Step 3: Verify Clarity Functionality
-
Deploy the Website:
- Generate static files using
hugocommand and deploy them to your hosting platform (e.g., GitHub Pages, Vercel, or Netlify). - Ensure that the Clarity tracking code is correctly embedded in the generated HTML files (you can check the
<head>tag using browser developer tools).
- Generate static files using
-
Check Clarity Dashboard:
- Log into the Clarity dashboard, and after a few minutes (usually 2 hours), check for user visit data, heatmaps, or session recordings.
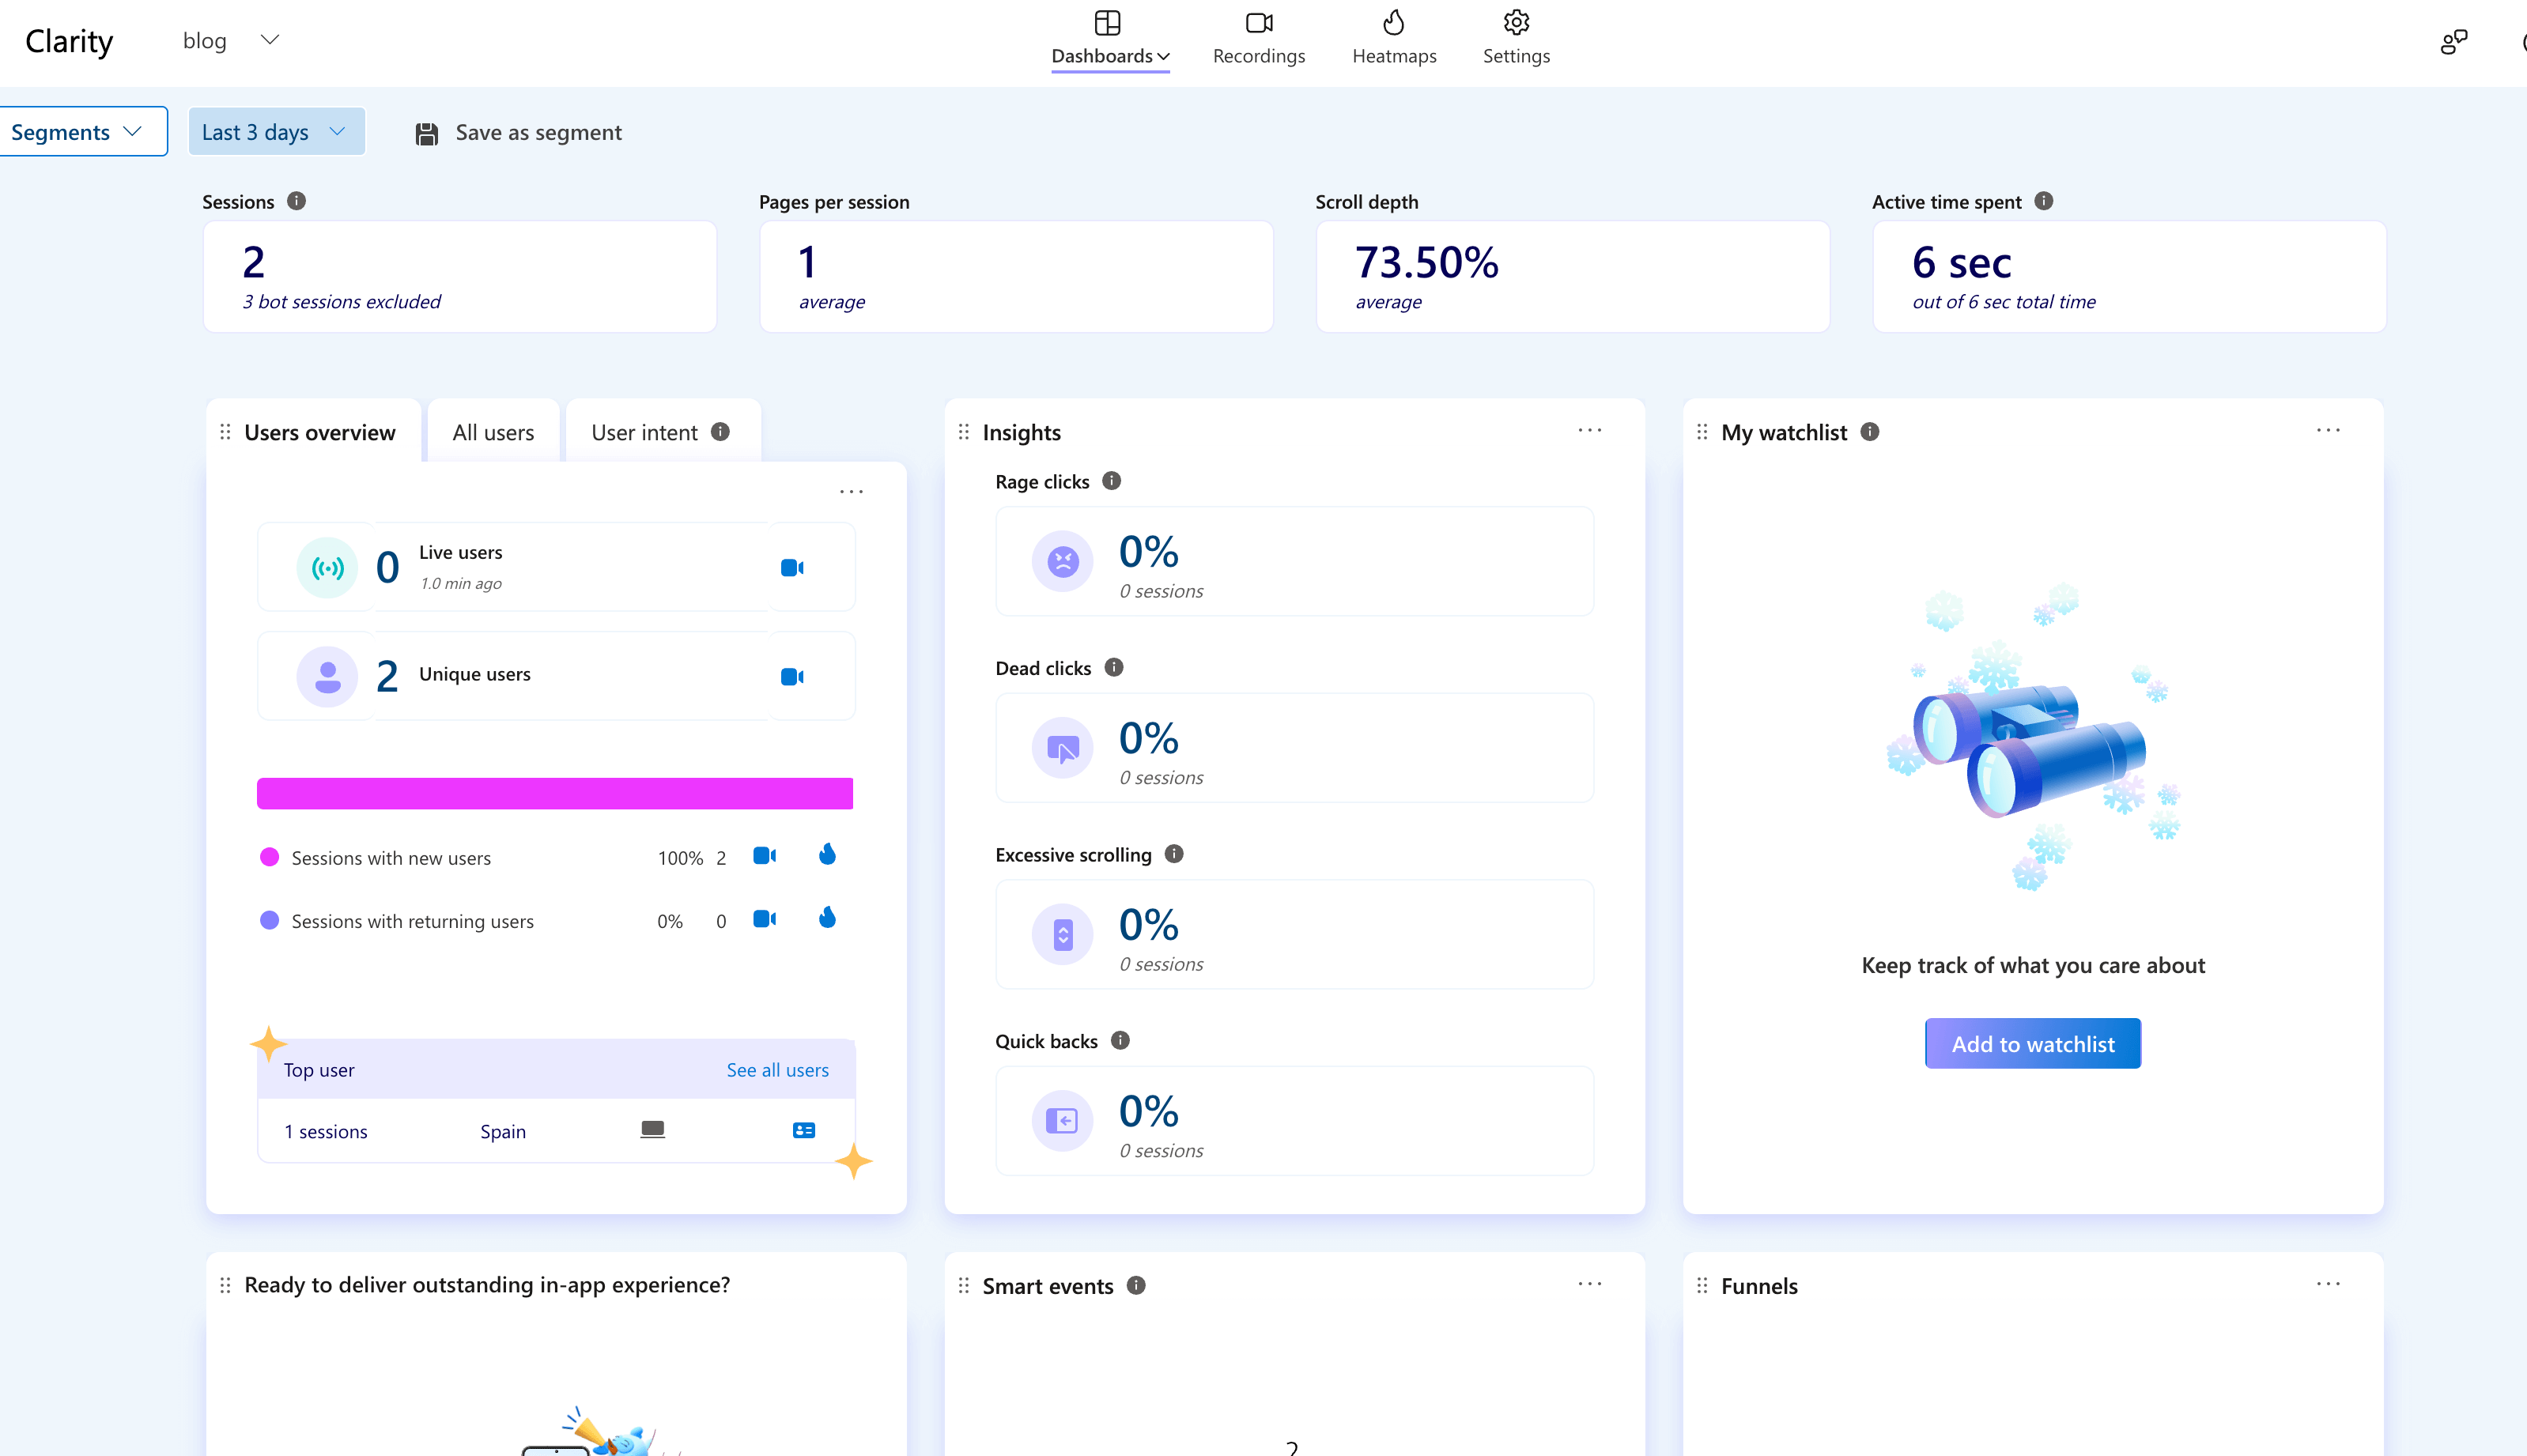
- If there is no data, verify:
- The project ID is correct.
- The tracking code is correctly embedded in the
<head>tag. - The website has been deployed to the public network.
- Log into the Clarity dashboard, and after a few minutes (usually 2 hours), check for user visit data, heatmaps, or session recordings.
Step 4: Optimization and Considerations
-
Avoid Development Interference:
- As mentioned above, use
{{ if not .Site.IsServer }}to prevent tracking data interference during local development.
- As mentioned above, use
-
Privacy and Compliance:
- Clarity collects user behavior data, so ensure that your website’s privacy policy mentions the use of Clarity for analysis.
- If your blog targets EU users, comply with GDPR requirements and consider adding a cookie consent notice.
-
Combine with Google Analytics:
- Clarity’s heatmap and session recording features complement Google Analytics traffic statistics. Using both can provide a more comprehensive analysis.
-
Regular Data Checking:
- Periodically review the Clarity dashboard’s heatmap and session recordings to analyze user click behavior and page scroll depth, optimizing blog content layout.
コメント