이것은 나만의 블로그 시스템을 구축하는 세 번째 튜토리얼로, 블로그에 댓글 시스템을 추가하는 방법입니다.
블로그를 구축하는 과정에서, 훌륭한 댓글 시스템은 상호작용을 크게 향상시킬 수 있습니다. 오늘 저는 Hugo 블로그에 Giscus라는 GitHub Discussions 기반의 오픈소스 댓글 시스템을 통합하는 방법을 소개할 것입니다.
왜 Giscus를 선택해야 할까요?
- 🚀 서버가 필요 없고, GitHub Discussions 기반
- 🔒 안전하고 신뢰할 수 있으며, 댓글 데이터는 GitHub에 저장
- 🧩 다크 모드 및 적응형 테마 지원
- 💬 익명 댓글 지원(선택적)
- 🌍 다국어 인터페이스 지원
준비 사항
시작하기 전에, 다음이 필요합니다:
- GitHub에서 호스팅되는 리포지토리
- Discussions 기능 활성화
- Hugo 블로그 (어떤 테마도 가능)
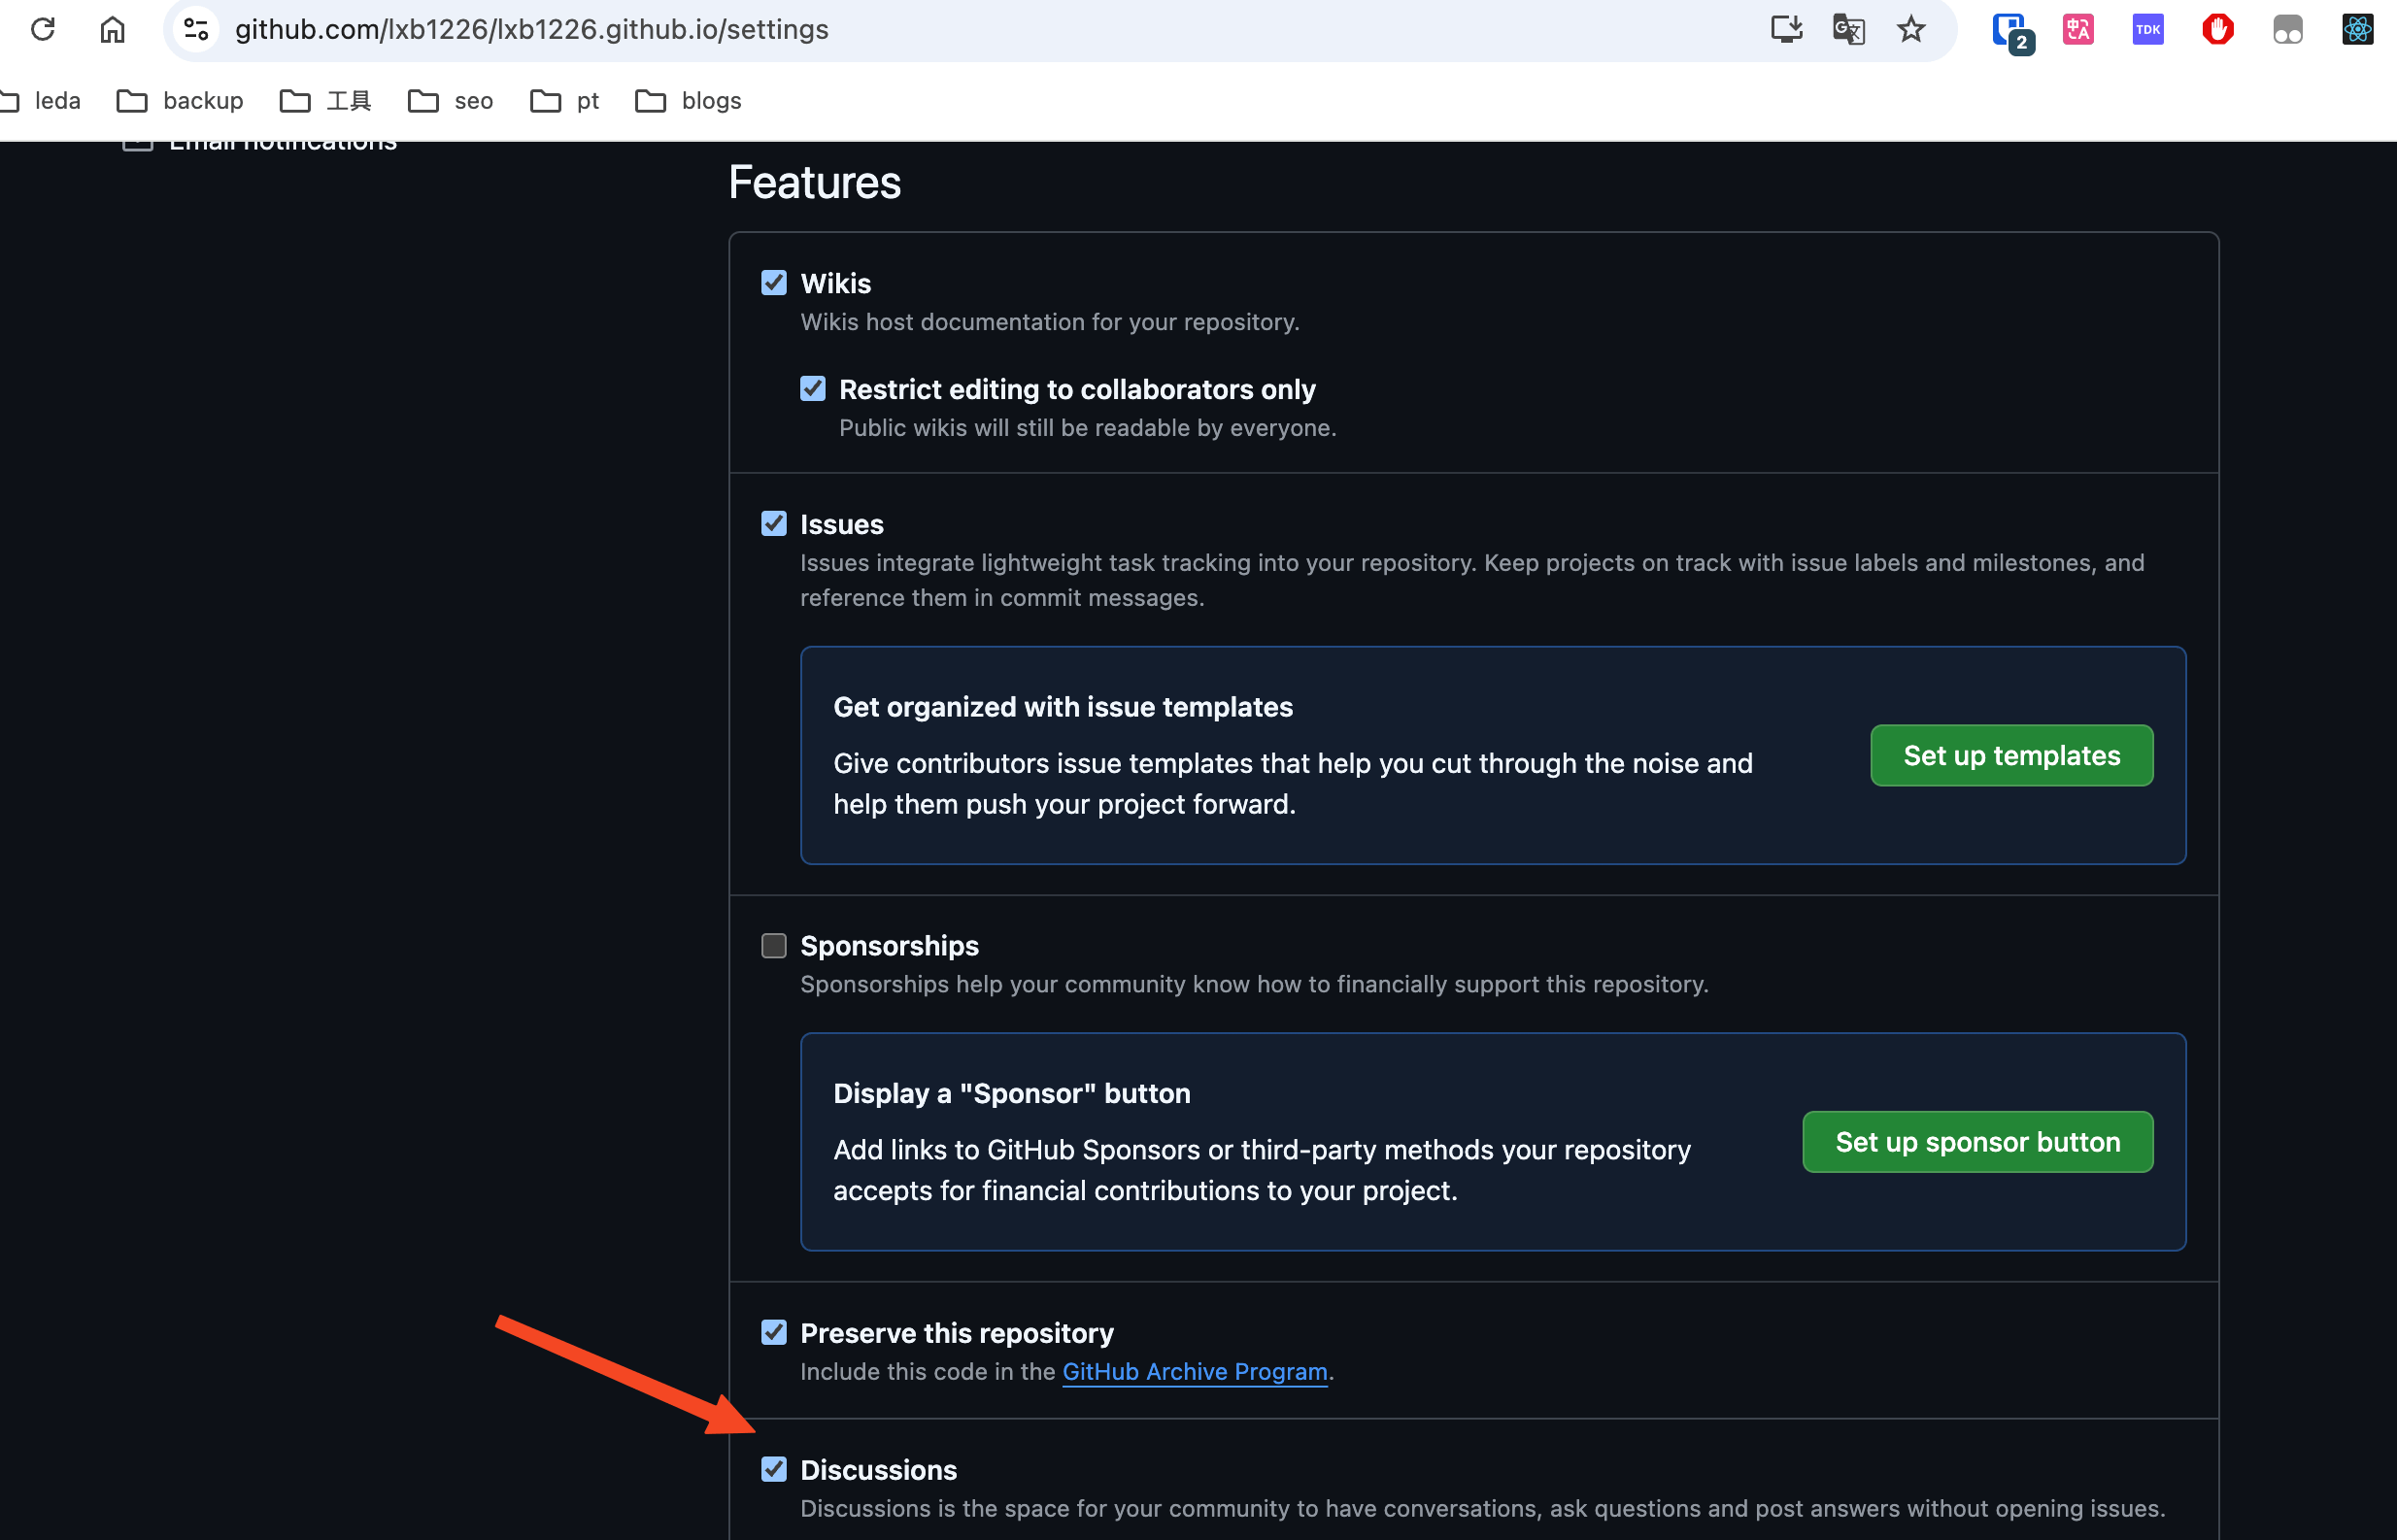
단계 1: GitHub Discussions 활성화하기
- 블로그 코드 리포지토리(예:
username/blog)를 엽니다. - Settings → Features로 가서 Discussions를 체크합니다.
단계 2: Giscus 설정하기
https://giscus.app로 이동하여:
- 자신의 GitHub 리포지토리를 선택합니다.
- 댓글을 어떤 Discussion 카테고리에서 생성할지 설정합니다(예:
announcement새로 만들기). - 사용자 정의 설정:
- Mapping:
pathname을 선택하는 것을 추천합니다. 즉 페이지 경로에 따라 논의를 연결합니다. - Reaction: 좋아요 등의 작업을 허용할지 여부.
- 테마:
light,dark,preferred_color_scheme등을 지원합니다.
- Mapping:
- 생성된
<script>코드를 복사합니다.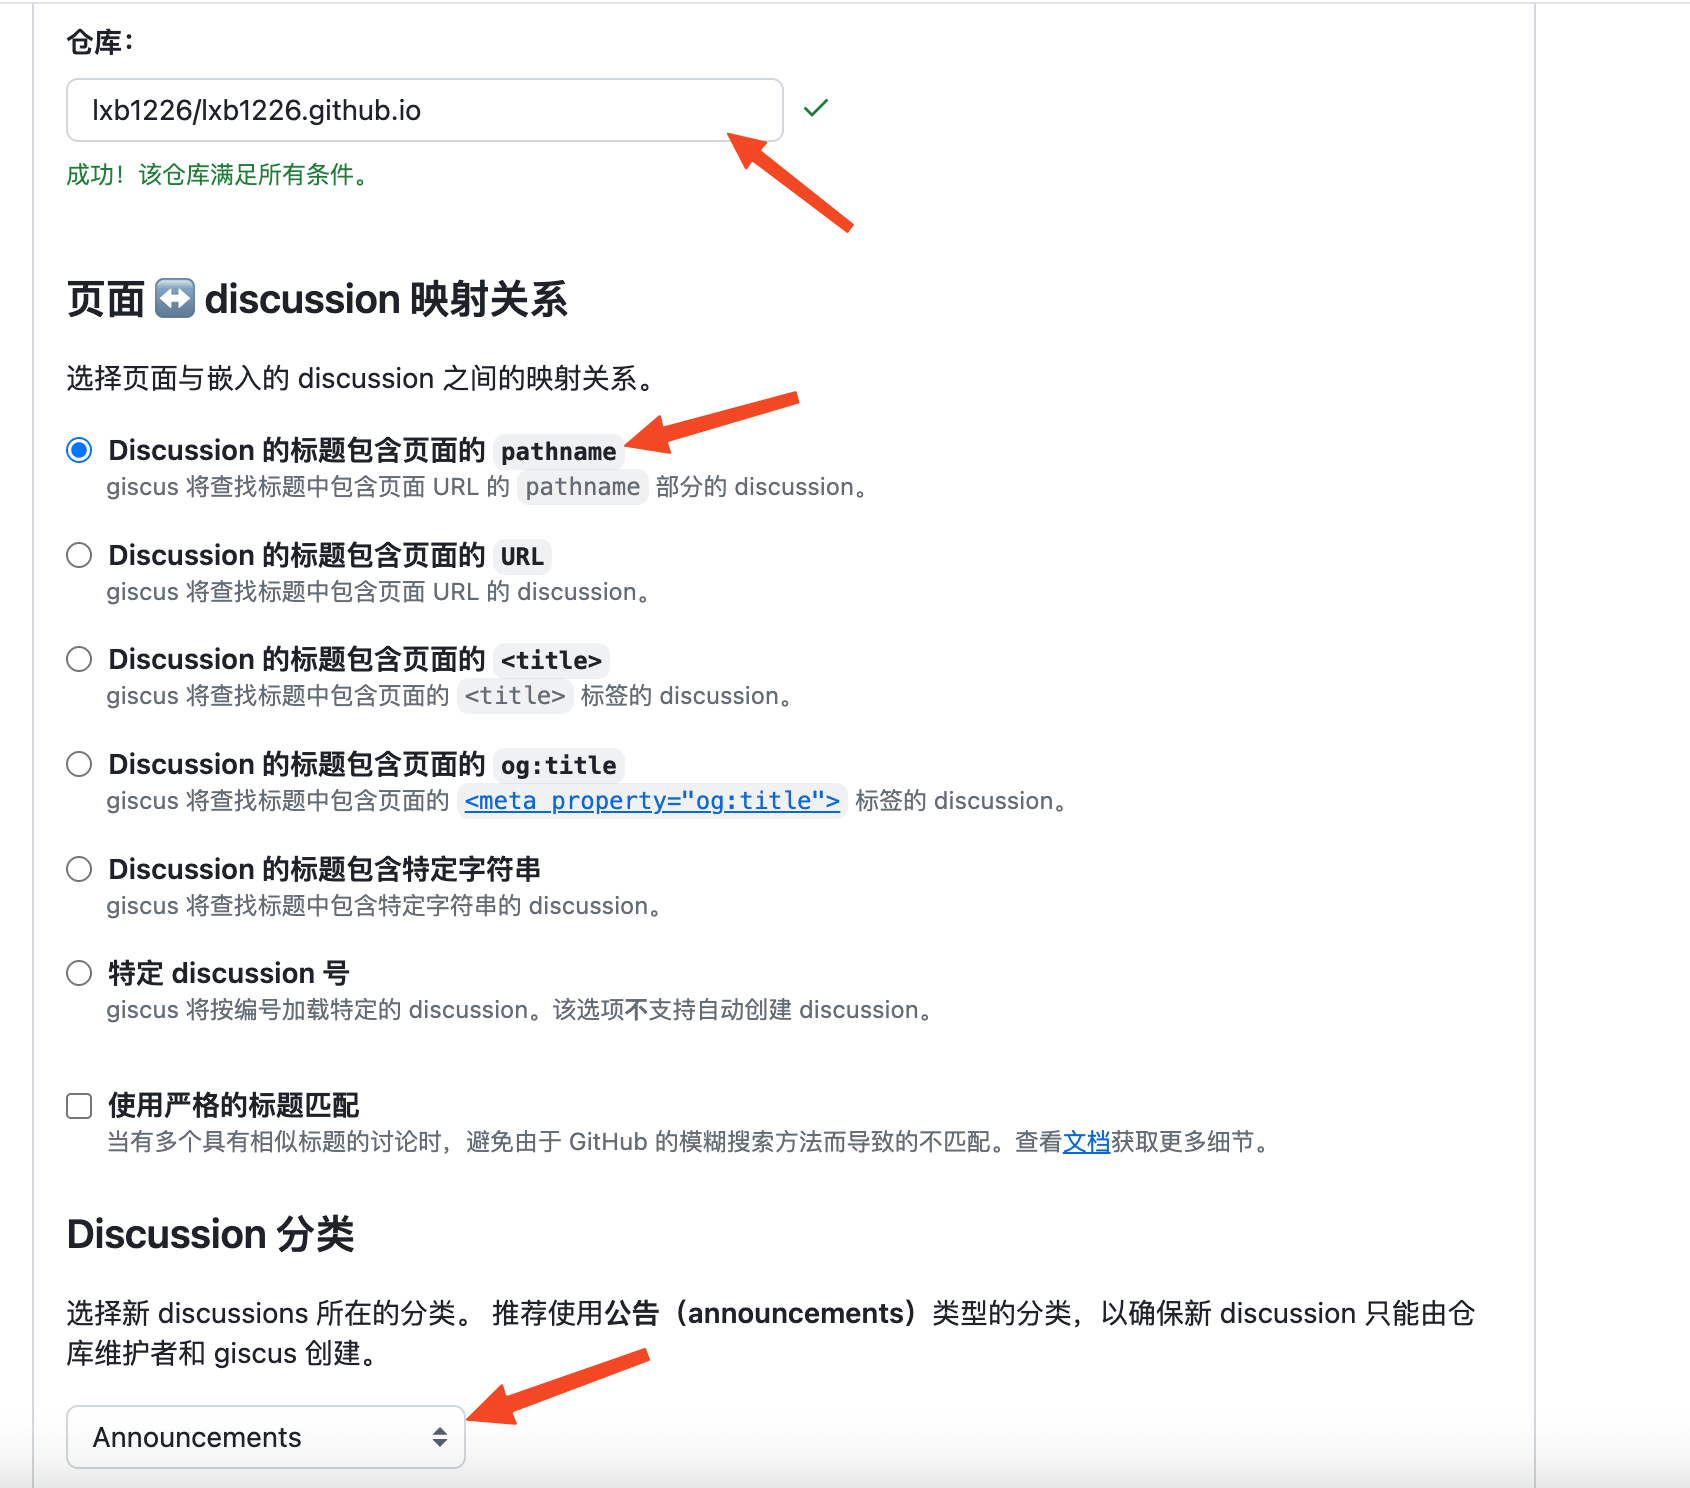
<script src="https://giscus.app/client.js"
        data-repo="yourname/yourrepo"
        data-repo-id="REPO_ID"
        data-category="General"
        data-category-id="CATEGORY_ID"
        data-mapping="pathname"
        data-strict="0"
        data-reactions-enabled="1"
        data-emit-metadata="0"
        data-input-position="bottom"
        data-theme="preferred_color_scheme"
        data-lang="zh-CN"
        crossorigin="anonymous"
        async>
</script>여기서 data-repo, data-repo-id, data-category-id 이 세 가지 매개변수를 기억해야 합니다. 이후 설정에서 사용될 것입니다.
단계 3: Giscus를 Hugo 테마에 통합하기
제가 사용하는 테마는 hugo-narrow로, 이 테마는 Giscus 댓글 시스템이 통합되어 있습니다. 여러분은 간단하게 설정만 하면 됩니다. 다음은 저의 설정입니다:
  comments:
    enabled: true
    # giscus, disqus, utterances, waline, artalk, twikoo
    system: "giscus"

    giscus:
      repo: "data-repo"
      repoId: "data-repo-id"
      category: "Announcements"
      categoryId: "data-category-id"
      mapping: "pathname"
      strict: "0"
      reactionsEnabled: "1"
      emitMetadata: "0"
      inputPosition: "bottom"
      theme: "preferred_color_scheme"
lang: "en"여기서 repo, repoId, categoryId를 단계 2에서 저장한 값으로 바꿔야 합니다. 그래야 댓글이 정상적으로 표시됩니다.
또한 enable은 true로, system은 giscus로 설정해야 합니다. 그렇지 않으면 댓글이 표시되지 않습니다.
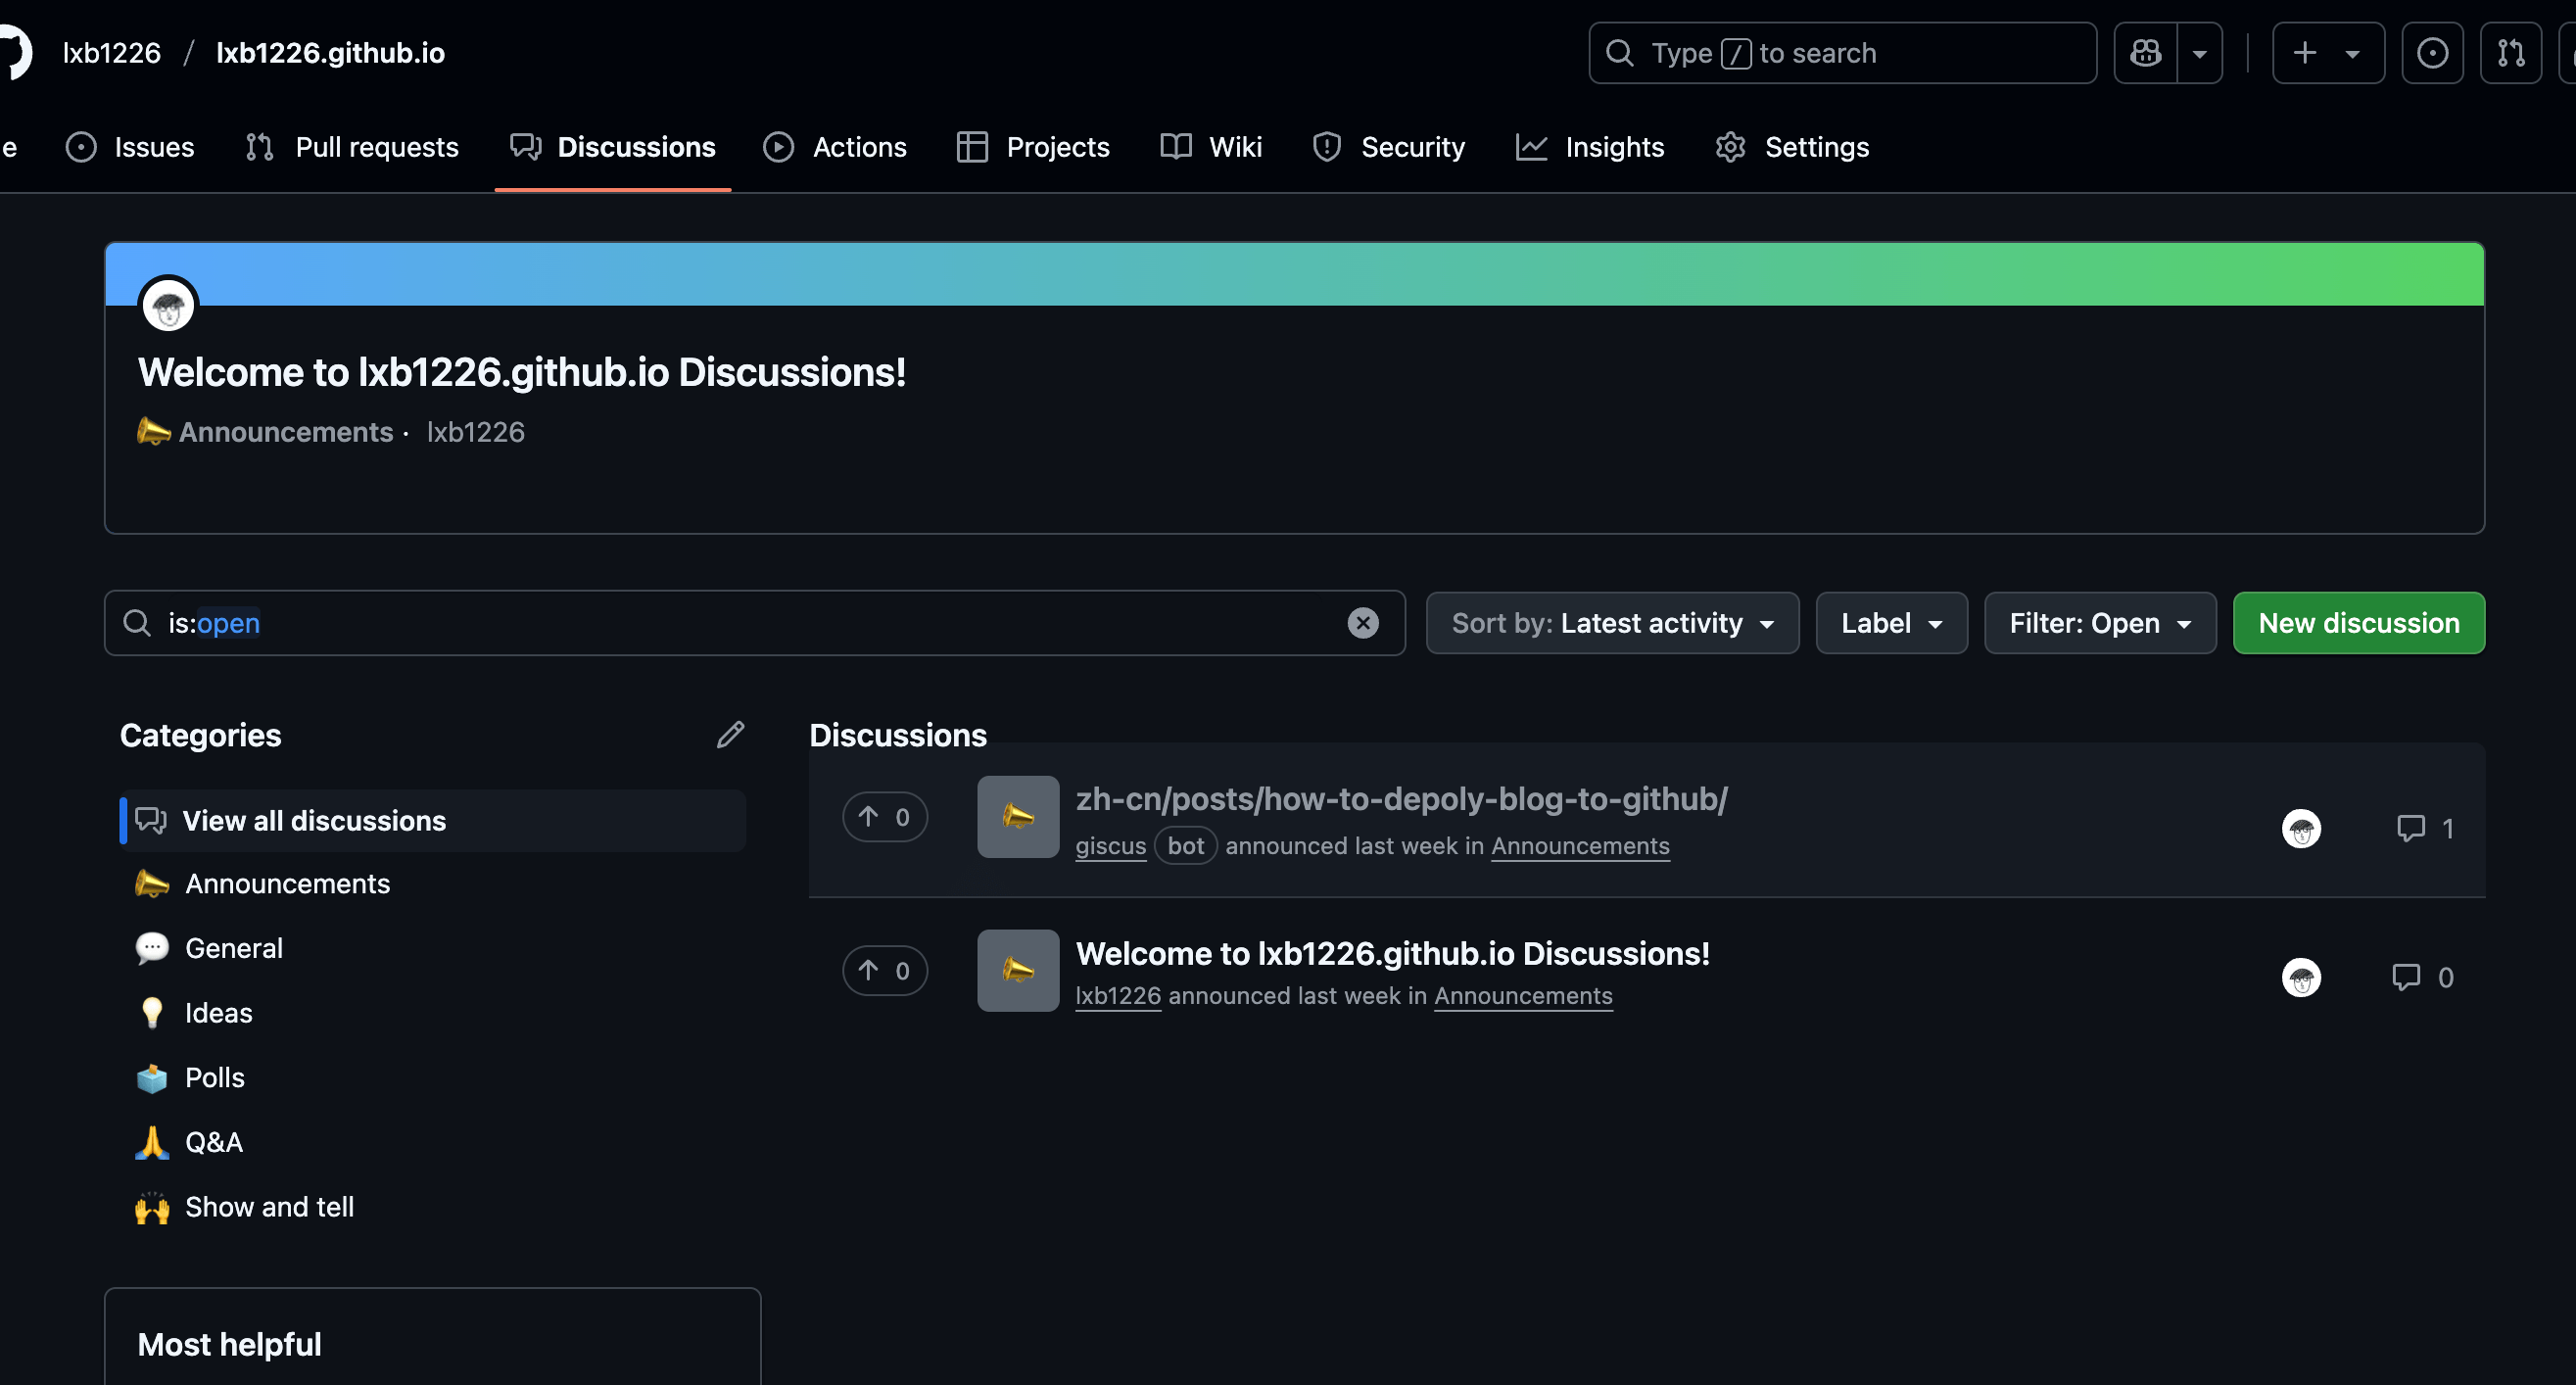
최종적으로, 웹 페이지의 마지막에 이렇게 생긴 인터페이스를 보게 될 것입니다:
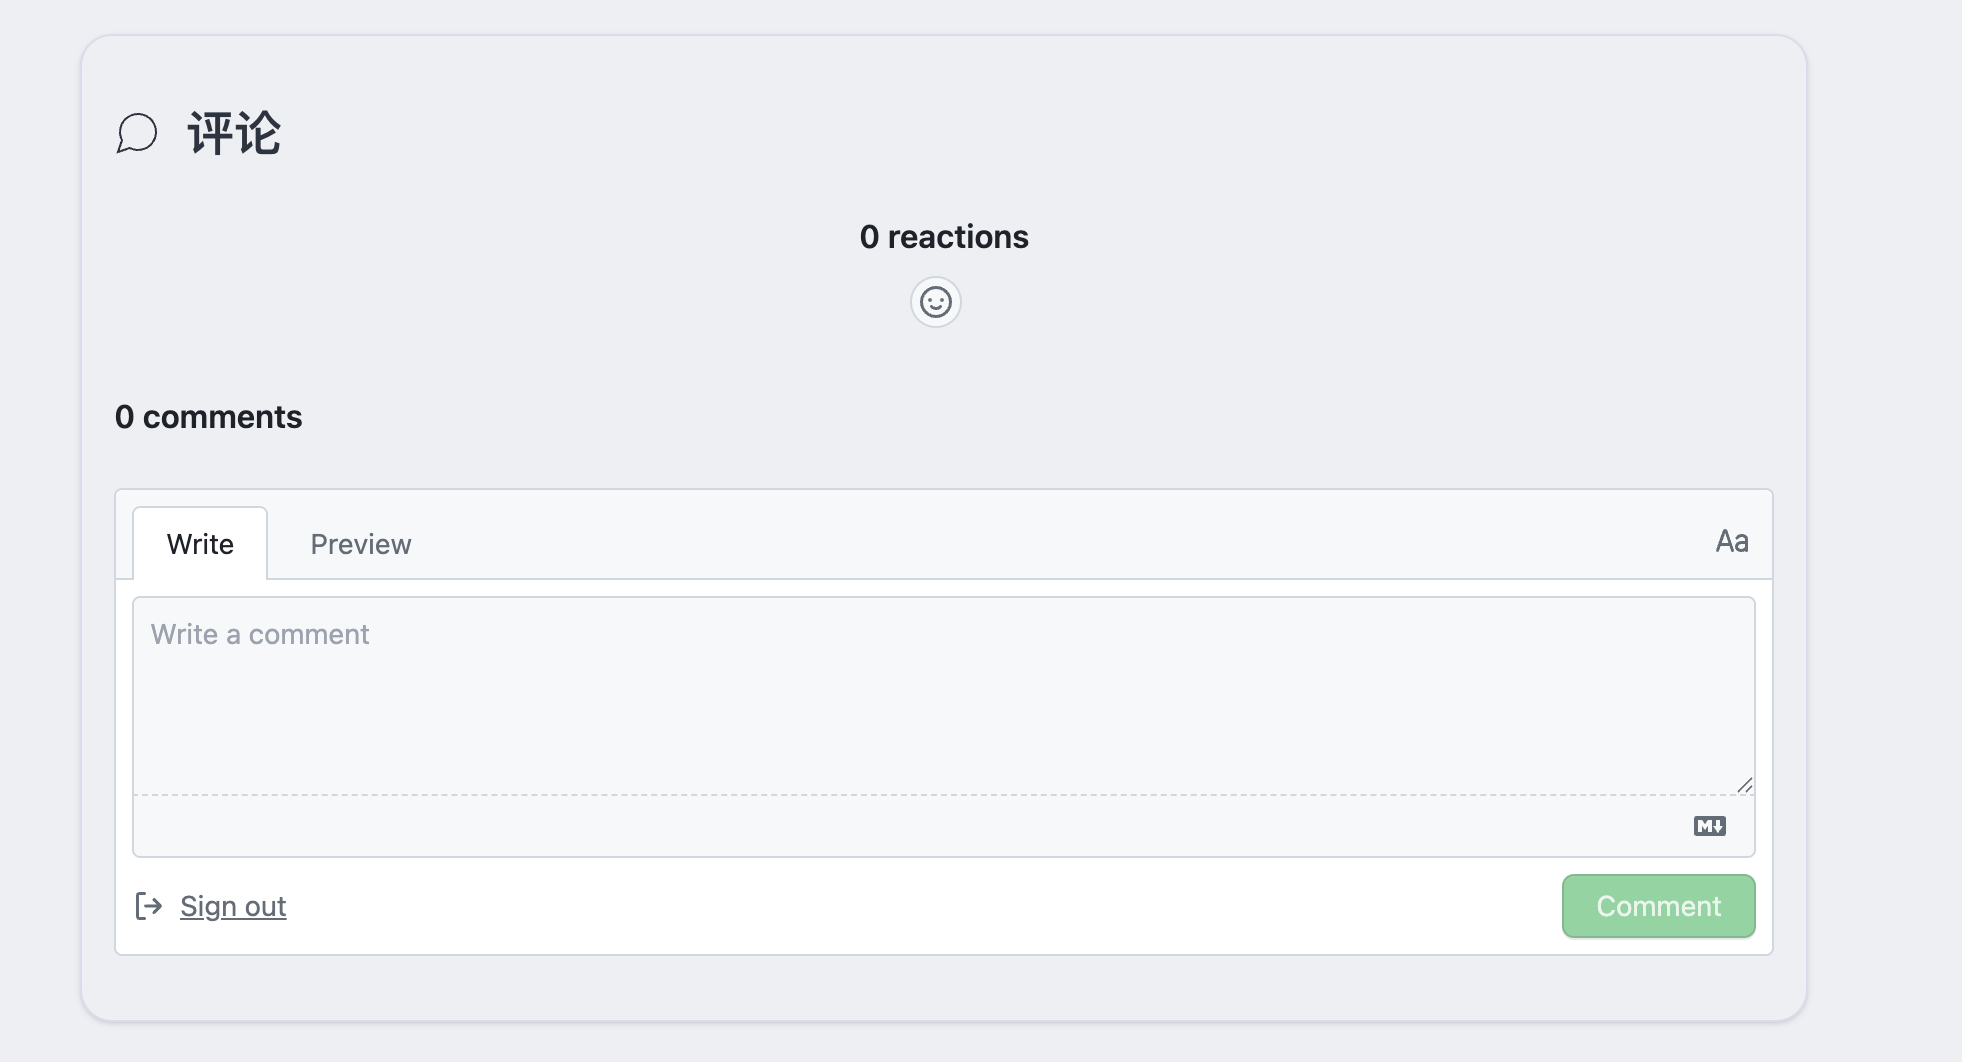
테스트
이 글 아래에 댓글을 달아보며 댓글이 정상적으로 표시되는지 확인해 보세요. 댓글 후에 남긴 댓글은 GitHub의 Discussion에서 확인할 수 있습니다.
여기에서 제 블로그의 댓글을 여기에서 확인할 수 있습니다.
댓글