如何将 Hugo 博客同步到 GitHub Profile
当我们部署好我们的blog之后,我们会希望每次我们的blog更新之后,我们的github profile也能够自动更新,这样我们的github profile就能够展示我们的最新blog文章。我们可以利用 GitHub action 来完成这件事。
前提条件
在开始之前,请确保你已完成以下准备工作:
- Hugo 博客:已搭建好 Hugo 博客,并托管在 GitHub 仓库(如
username/username.github.io或自定义仓库)。 - GitHub 仓库:拥有一个用于存储博客源文件的仓库(例如
username/blog)和一个用于 GitHub Pages 的仓库(例如username/username.github.io),。 - GitHub Profile README:已在 GitHub 上启用 Profile README(创建一个与用户名同名的仓库,如
username/username, 例如 我的 GitHub Profile)。 - 基础 Git 知识:了解如何提交代码、配置
.gitignore和使用 GitHub Actions。
什么是 blog-post-workflow?
blog-post-workflow 是一个由 Gautam Krishnar 开发的 GitHub Action,专门用于将博客的最新文章同步到 GitHub Profile README 或其他指定位置。它支持多种博客框架(包括 Hugo),通过解析 RSS 提要(feed)获取最新文章,并自动更新目标文件。
步骤 1:设置 Hugo 博客仓库
-
确保 Hugo 博客生成 RSS 提要: Hugo 默认会生成 RSS 提要(通常位于
public/index.xml)。在你的 Hugo 配置文件(config.toml或config.yaml)中,确保启用了 RSS 输出:TOML[outputs] home = ["HTML", "RSS"]运行
hugo命令后,检查public目录下是否存在index.xml文件。Tips: 如果你的blog是多语言的,那么 RSS 提要的地址应该是
https://your-blog-domain/index.xml,而不是https://your-blog-domain/en/index.xml或https://your-blog-domain/zh/index.xml等。 -
托管博客内容:
- 确保你的 Hugo 博客源文件存储在一个仓库中(例如
username/blog)。 - 静态文件(
public目录)应推送到 GitHub Pages 仓库(例如username/username.github.io)。 - 在 GitHub Pages 仓库的 Settings > Pages 中,启用 GitHub Pages,并选择正确的分支(通常是
main或gh-pages)。
- 确保你的 Hugo 博客源文件存储在一个仓库中(例如
-
验证博客访问: 确保你的博客可以通过自定义域名(如
https://username.github.io)或 GitHub Pages 默认域名访问。
步骤 2:设置 GitHub Profile README
-
创建 Profile README 仓库:
- 在 GitHub 上创建一个与你的用户名同名的仓库(例如
username/username)。 - 在仓库根目录下创建一个
README.md文件,用于展示你的 GitHub Profile 内容。
- 在 GitHub 上创建一个与你的用户名同名的仓库(例如
-
添加博客占位符: 在
README.md中添加一个占位符,用于动态插入博客文章。例如:MARKDOWN## 我的最新博客文章 <!-- BLOG-POST-LIST:START --> <!-- BLOG-POST-LIST:END -->blog-post-workflow将会替换此占位符为最新的博客文章链接。
步骤 3:配置 blog-post-workflow
-
创建 GitHub Actions 工作流: 在你的 Profile README 仓库(
username/username)中,创建以下目录结构:PLAINTEXT.github/workflows/blog-post.yml -
编写工作流文件: 在
blog-post.yml中添加以下内容,配置blog-post-workflow:YAMLname: Sync Blog to Profile README on: schedule: - cron: "0 0 * * *" # 每天运行一次 workflow_dispatch: # 允许手动触发 jobs: update-readme-with-blog: runs-on: ubuntu-latest steps: - uses: actions/checkout@v4 - uses: gautamkrishnar/blog-post-workflow@v1 with: feed_list: "https://username.github.io/index.xml" # 替换为你的博客 RSS 地址 max_post_count: 5 # 同步最近 5 篇文章 readme_path: ./README.md # 目标 README 文件 commit_message: "Update README with latest blog posts"- feed_list:替换为你的 Hugo 博客 RSS 提要地址(通常是
https://your-blog-domain/index.xml)。 - max_post_count:设置要显示的最新文章数量。
- readme_path:确保指向正确的 README 文件路径。
- commit_message:自定义提交信息。
- feed_list:替换为你的 Hugo 博客 RSS 提要地址(通常是
-
提交工作流文件: 将
blog-post.yml提交到你的 Profile README 仓库。GitHub Actions 将在每天午夜(UTC)自动运行,或通过 GitHub 的 Actions 面板手动触发。
步骤 4:验证同步结果
-
检查 GitHub Actions 日志:
- 转到 Profile README 仓库的 Actions 选项卡,查看
Sync Blog to Profile README工作流的运行状态。 - 确保没有错误,且工作流成功完成。
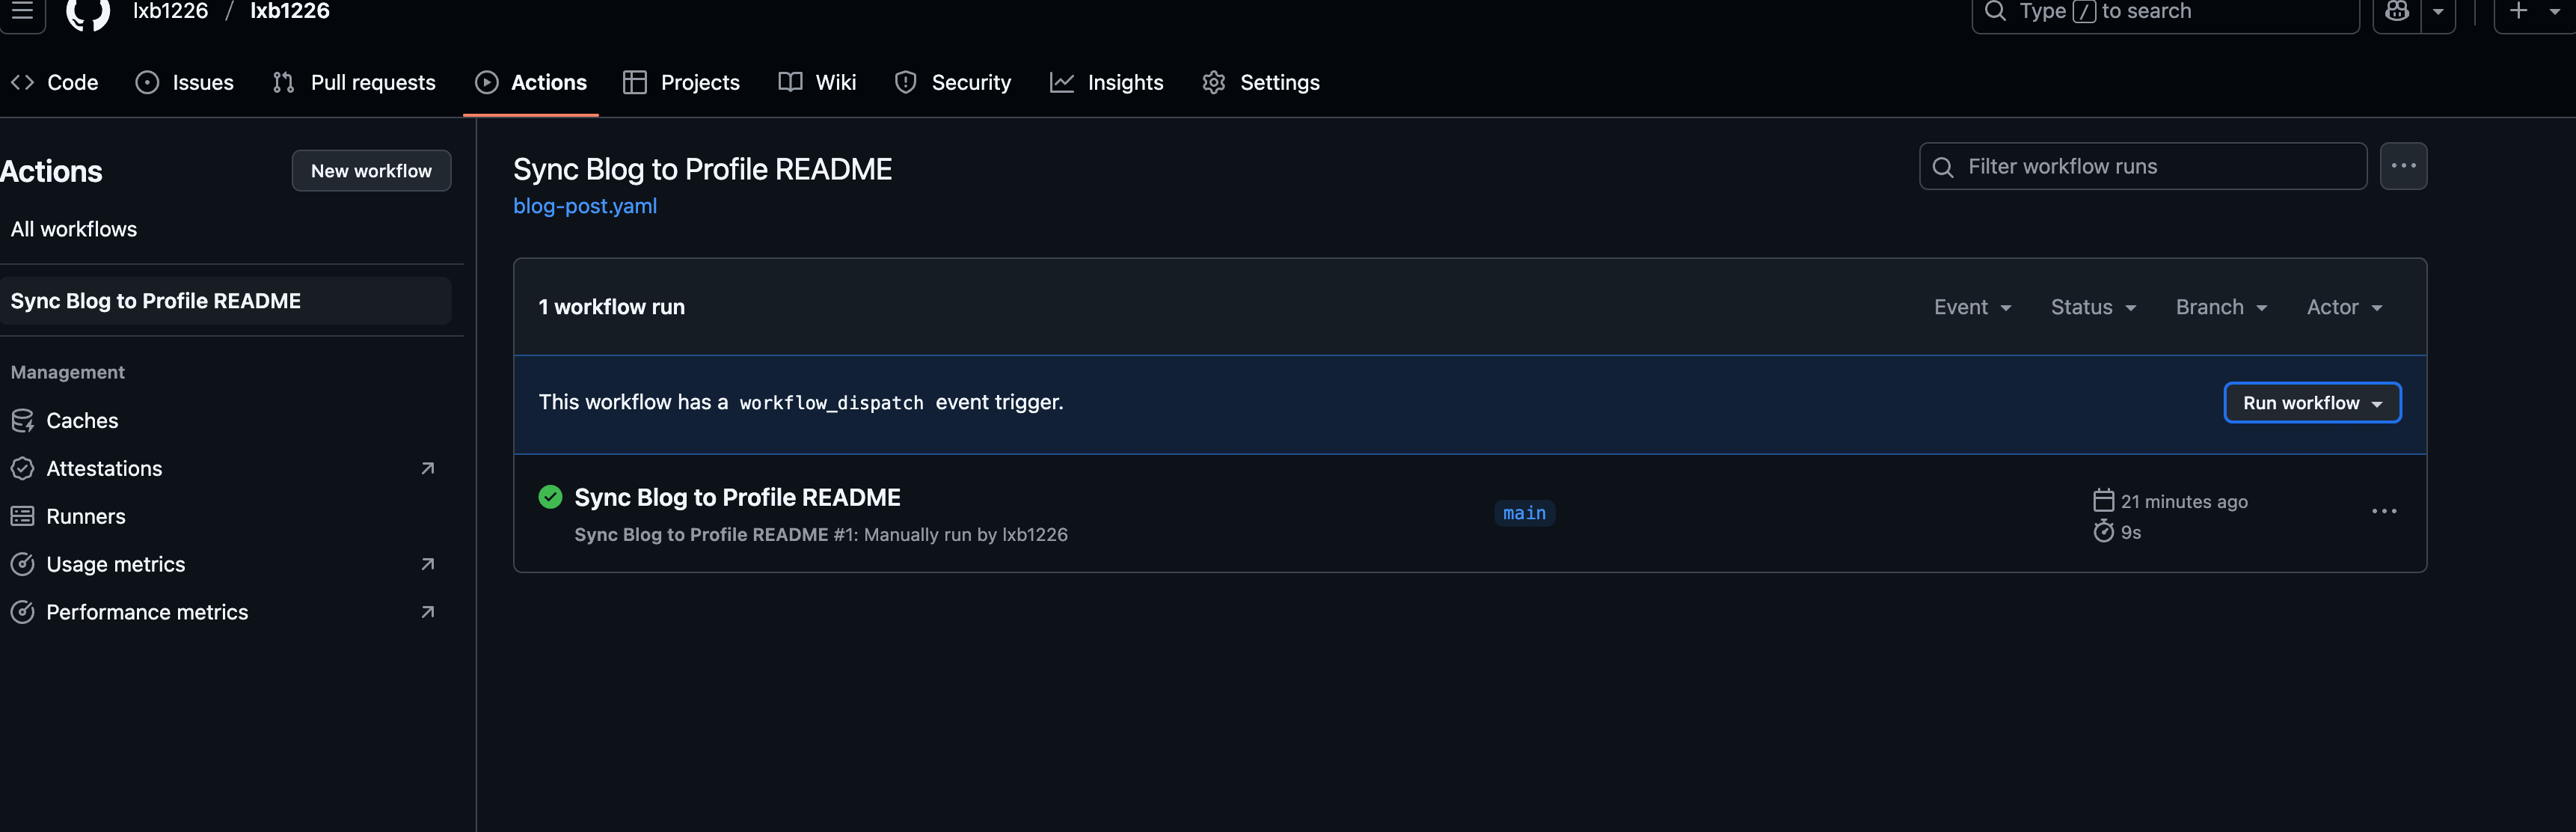
- 你也可以手动触发工作流,检查 README 是否已更新。点击
Run workflow即可手动触发。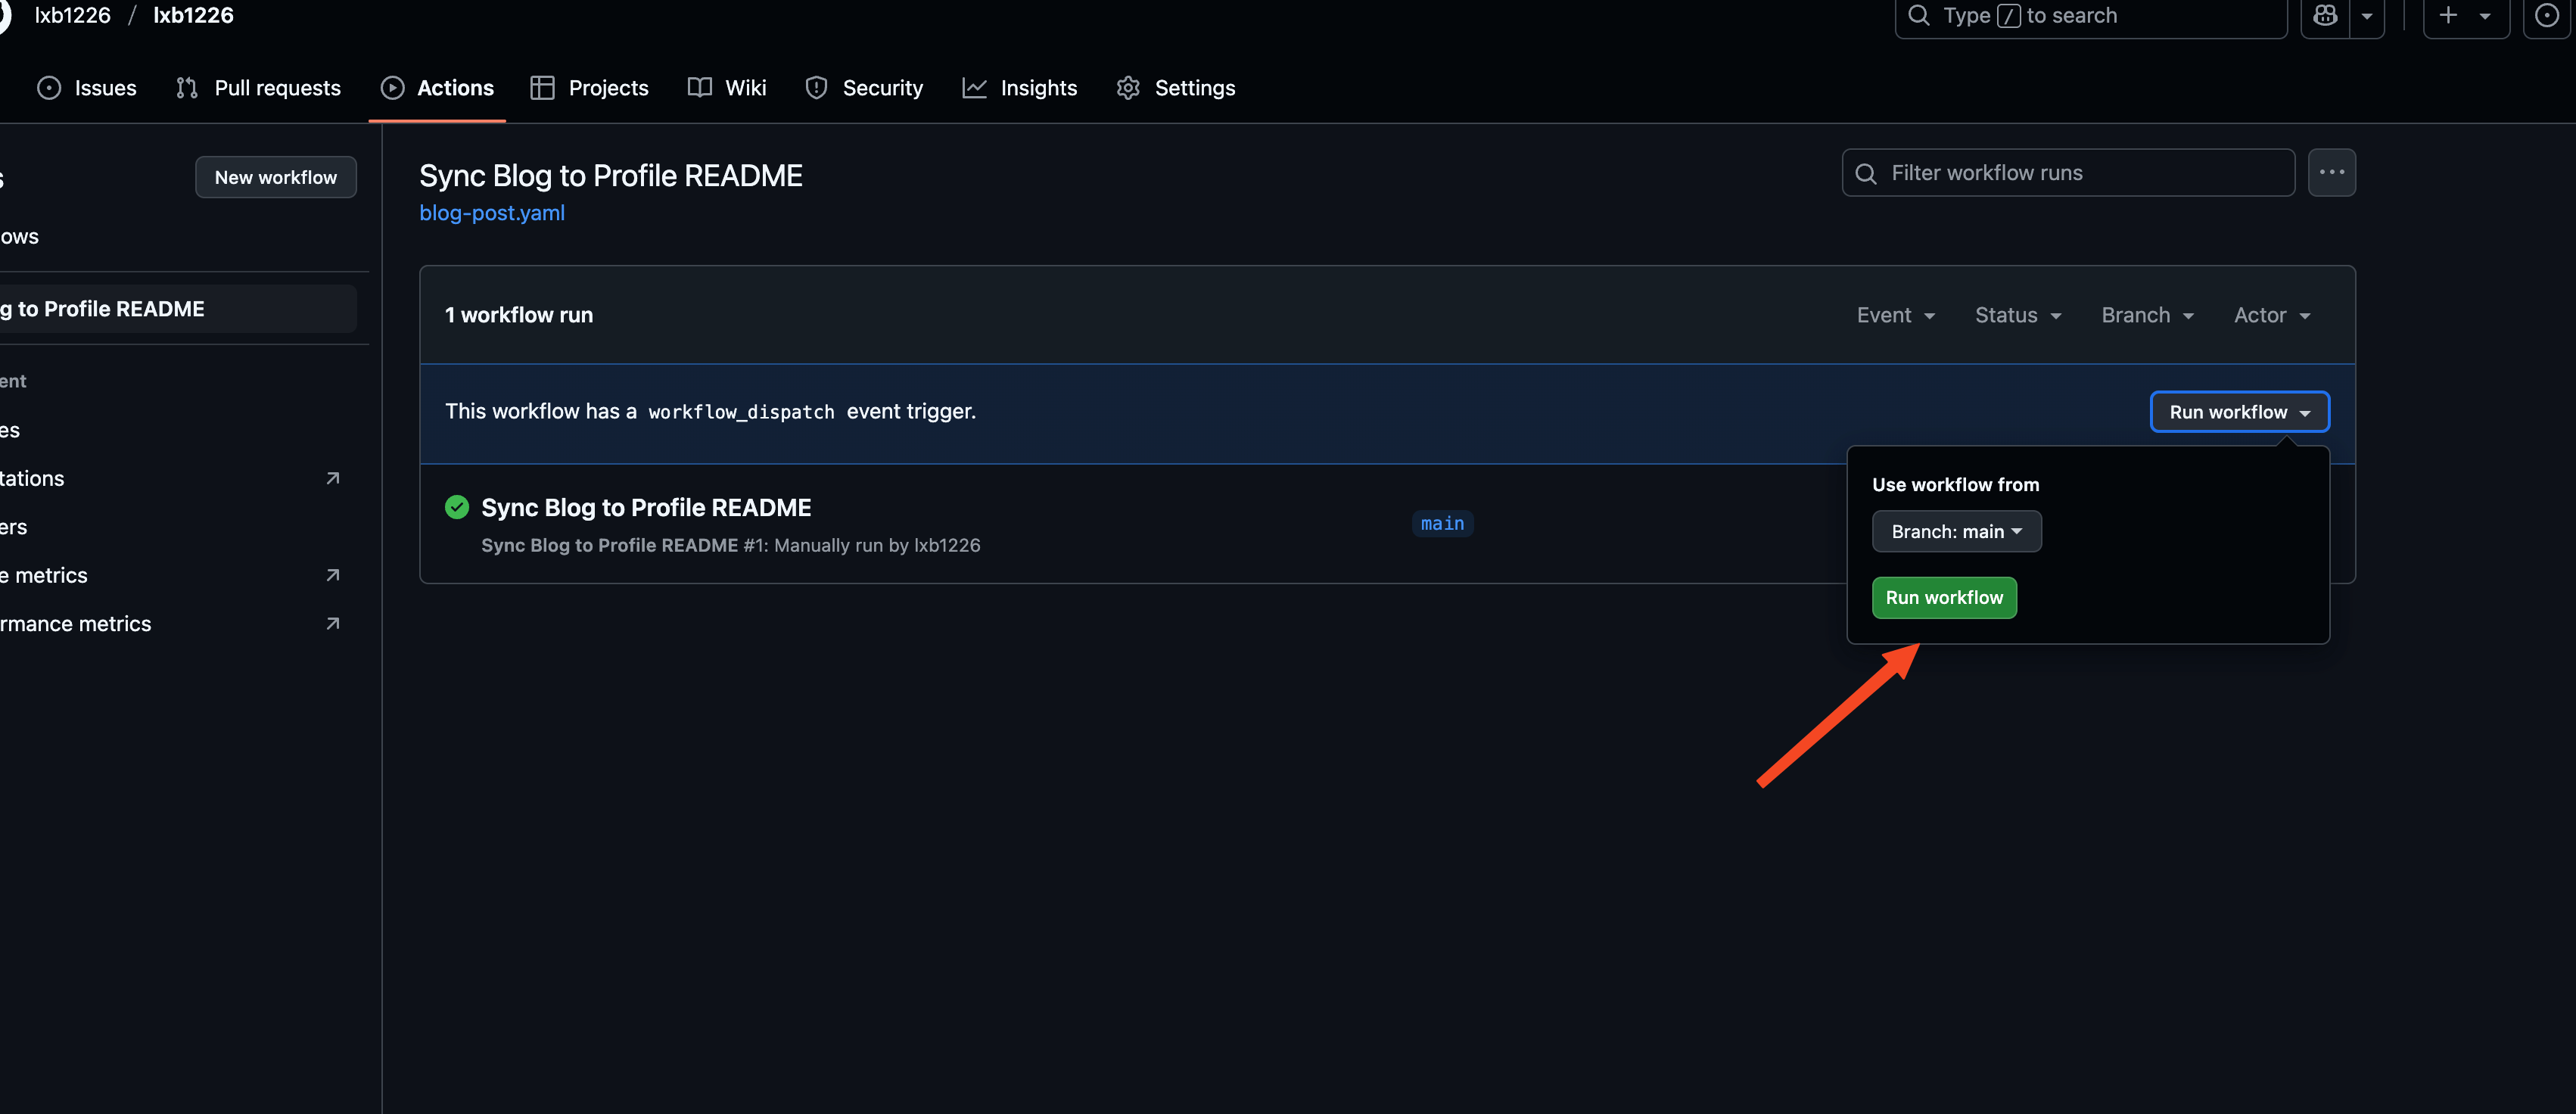
- 转到 Profile README 仓库的 Actions 选项卡,查看
-
查看 README 更新:
- 打开
username/username仓库的README.md,检查<!-- blog-post-workflow -->占位符是否被替换为最新的博客文章列表。 - 示例输出可能如下:
MARKDOWN
## 我的最新博客文章
- [文章标题 1](https://username.github.io/post/xxx) - 2025-06-21
- [文章标题 2](https://username.github.io/post/yyy) - 2025-06-20
- 打开
-
访问 GitHub Profile: 打开你的 GitHub 主页(
https://github.com/username),确认最新的博客文章已显示在 Profile README 中。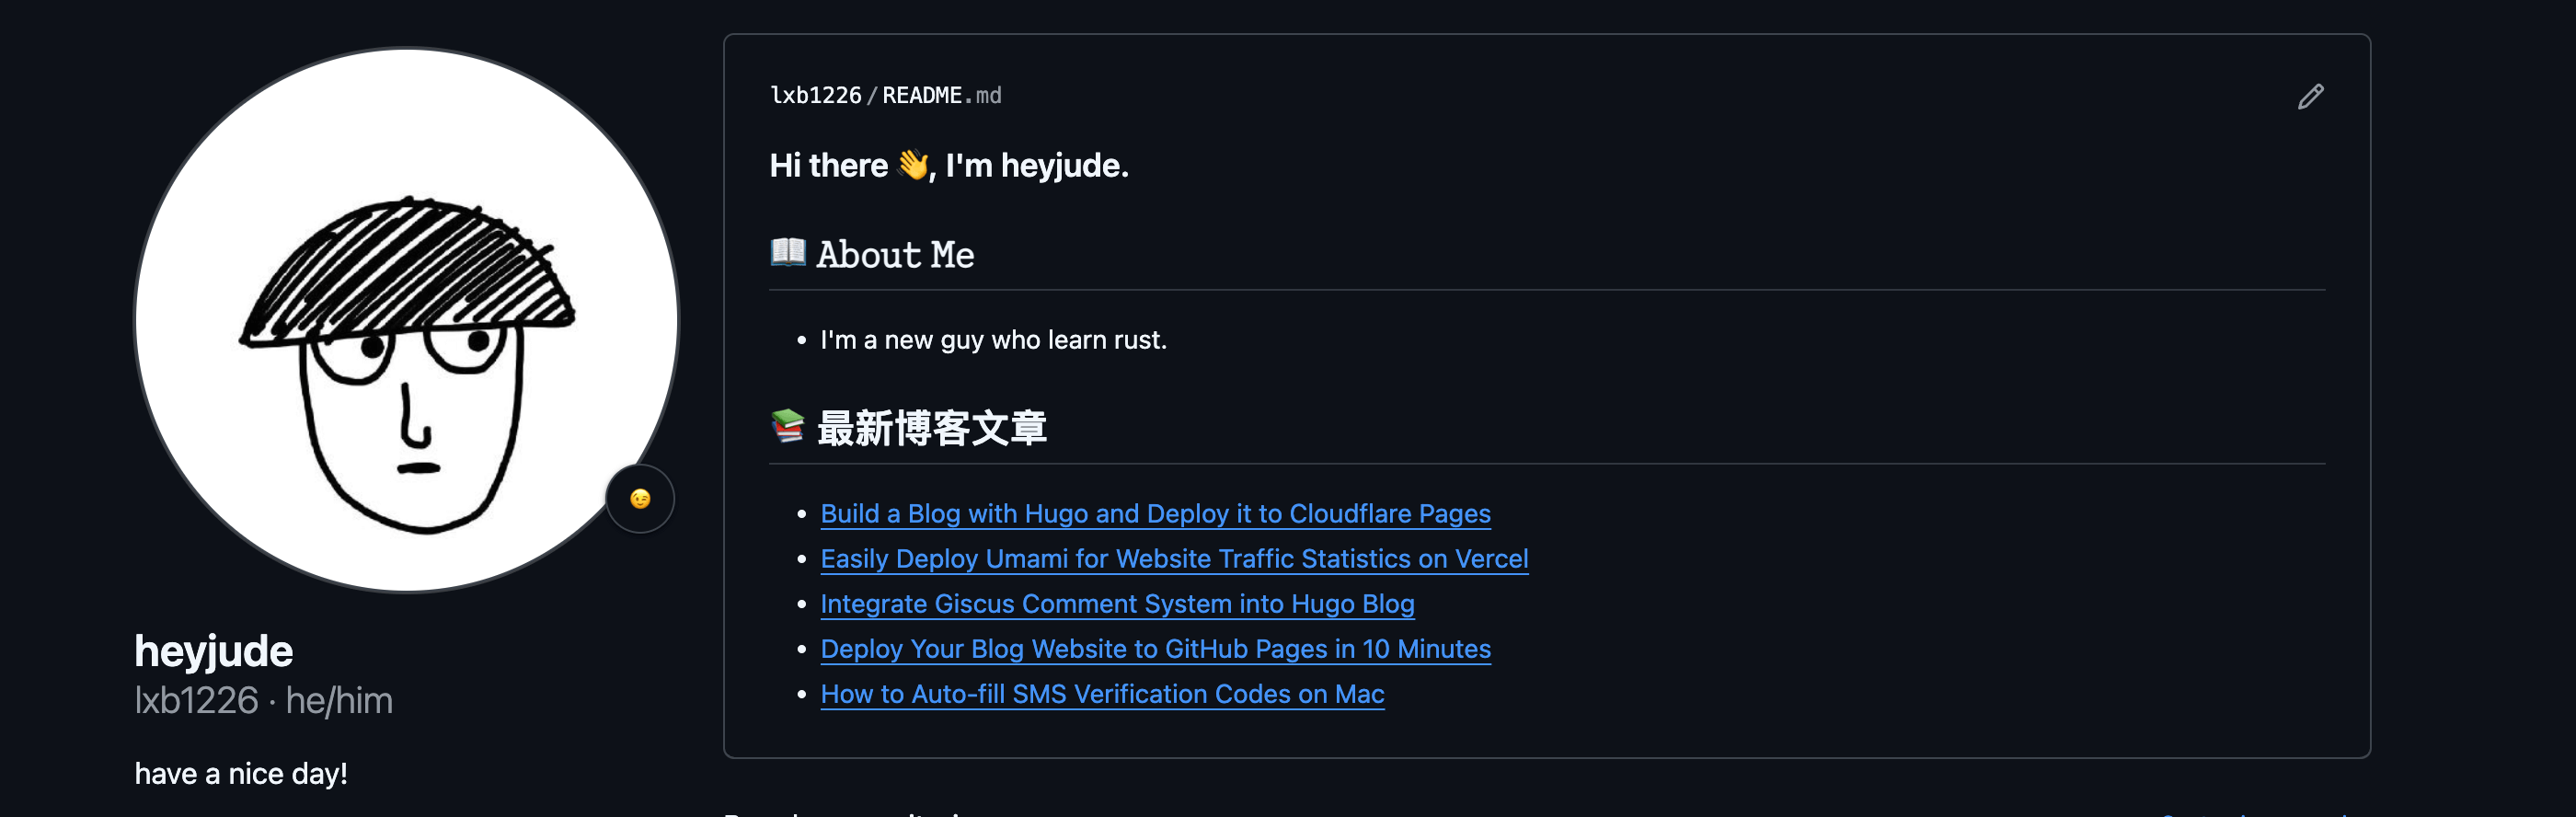
注意事项
- RSS 提要可用性:确保你的博客 RSS 提要(
index.xml)可以通过公共 URL 访问。如果博客托管在私有仓库,需调整为公共仓库或使用其他方式提供 RSS。 - GitHub Actions 权限:确保你的仓库启用了 Actions 写权限(Settings > Actions > General > Allow all actions and reusable workflows)。
- 同步频率:默认配置为每天同步一次,可根据需要调整
cron表达式(如每小时:0 * * * *)。 - 调试:如果同步失败,检查 Actions 日志,常见问题包括 RSS 地址错误或 README 文件路径不正确。
参考资源:
评论